A Beginner’s Guide to Soldering - Q Source - How to Solder
If you’re into electronics, wiring, or metals, you enjoy building and fixing things, and you like to work with your hands, you can rest assured that soldering is an excellent pastime for your interests. It’s a fun and fabulous hobby that, taken to higher levels, can open up unimagined new worlds of unlimited opportunity.
However, if you’re like a lot of us were, you may be feeling a little apprehension before taking the plunge. After all, you’ll be working with extreme temperatures, corrosive elements, and a few potentially harmful fumes, all while trying to manipulate a scalpel-like instrument with the precision of a brain surgeon — so come on, let’s get started with tips to show you how to solder safely and expertly!
Intro to Soldering 101
There’s no better place to start than the beginning — the very beginning. In this case, we’ll define soldering and solder, give the briefest of history lessons, and touch on the most common applications today. Soldering, then, is the fusing together of two or more items by applying a metal filler known as solder into an adjoining joint.Traditional solder was typically a 60% tin to 40% lead mixture, or alloy, that would melt at a little under 400-degrees Fahrenheit (around 200-degrees Celsius). Today’s solder, however, is very often lead-free and uses a variety of other metals instead, including silver and copper. The newer solder melts at about 430-degrees F and 220-degrees C.
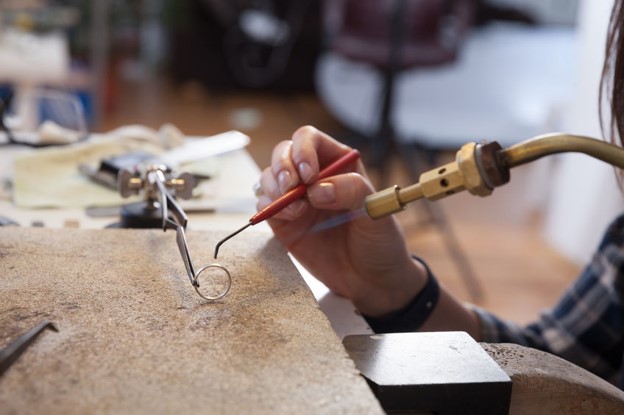
It is believed that soldering originated in ancient Mesopotamia more than 5,000 years ago and was used in the very earliest instances of metalwork. Some of the earliest known swords were crafted with the aid of soldering techniques, as was jewelry and cooking or eating utensils. Centuries later, soldering was also used to create stained glass throughout modern Europe and today, it is most commonly used for electronics, metals, plumbing, jewelry, and musical instruments.
 Tools of the Trade
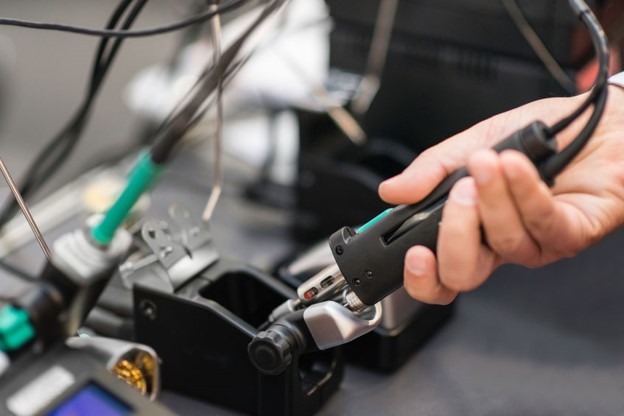
For starters, you’ll need solder, a soldering iron, a soldering-iron stand, a soldering-iron tip, soldering-iron tip cleaner, and tip-tinner, which gets its name from the tin content of the composition of the solder. As far as recommendations, we will only say that the best one-stop-shop for all your soldering needs is global distributor Q Source, which carries every leading brand of every product you’ll need. Other than that, we would only recommend a temperature-controlled iron if you can invest a little more, and a decent-quality, lead-free, multi-core rosin solder to get you started on the right track.There is an abundance of optional accessories that you can acquire at the outset of your adventure or add them piece-by-piece to your arsenal as you progress deeper into this new world. Some that come to mind are a flux pen, a desoldering braid, a desoldering pump, a heat sink, a third hand, and many more. To find your equipment, we suggest that you browse through the huge selection of soldering tools and accessories at Q Source for all your needs.
Some Safety Tips
Before you get started, you should really be aware of some basic but essential safety precautions. While some of them may seem obvious, they are all worth mentioning and you’d be surprised how common sense can escape you once you are entrenched in the work at hand if you’re not careful.- Always work in a well-ventilated area.
- Never touch the soldering-iron tip.
- Always put the soldering iron in its stand when not in use.
- Never work without gloves (available in small to 2X) and glasses.
- Always wash your hands after soldering.
Ready, Set, Go!
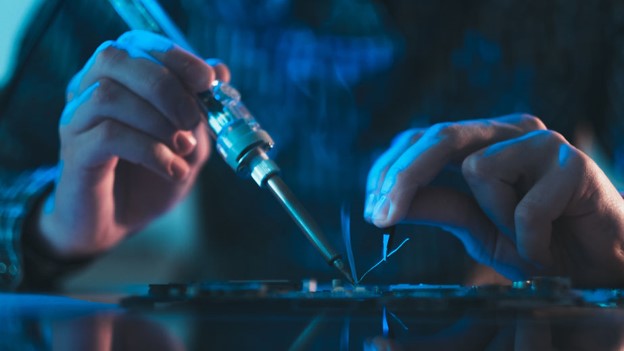
All right, you’re almost there, but first you have to prepare the soldering iron. Place it in the stand, plug it in and wait a few minutes for the iron to reach its working temperature of about 750-degrees Fahrenheit or about 400-degrees Celsius. While the iron is heating up, dampen your sponge in cold water and after the tip has heated up, give it a quick clean with the cool, damp sponge. (Remember, don’t touch the tip directly.)Next, try melting a little solder on the soldering-iron tip. If it takes, that means you have “tinned” the soldering iron and you’re ready to solder. We can start on a hypothetical circuit board.
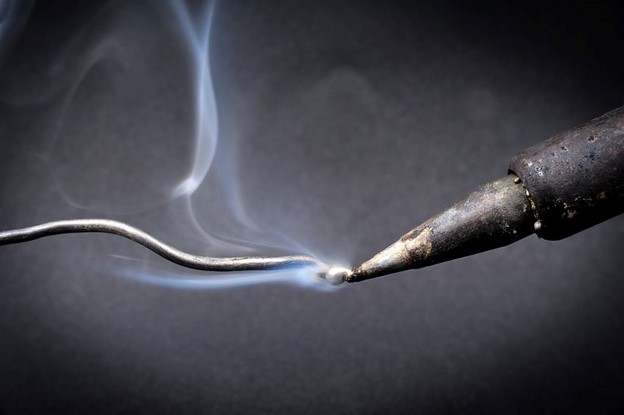
Now hold it as if you would a pen or a pencil and gently touch the tip onto the joint to be made. Touching the soldering-iron tip to both the component lead and the track, hold it in position and feed some solder onto the joint. The solder should flow seamlessly onto the lead and track and create a small bubble on the joint.
Let the joint cool for several seconds, move the circuit board and take a closer look at the joint you’ve just made. If successful, it should look like a glistening little mound — congratulations! If that’s not what you’re looking at, you will have to reheat the iron and add a little more solder — you’ll get it eventually! Experience is the best teacher here.
Desoldering
Eventually on this journey, you will have to a joint to reposition or remove a component or wire through desoldering. There are two methods to achieve this using one of two additional tools mentioned above.The first method is by using a copper desoldering braid or solder-remover braid that acts as a wick onto which the melted solder easily flows. If you position the end of the braid and the tip of your soldering iron onto the joint, the braid will pull the solder away from the joint. Then you remove the copper braid first followed by the soldering iron.
Then you cut off the length of the braid covered in solder and throw it away. The joint should now come apart seamlessly, giving you easy access to remove or reposition the component lead or wire. If it doesn’t, carefully apply the heated soldering iron to the stubborn joint while working the joint with your free fingers and it should come apart then. But be careful not to burn yourself during this particular maneuver!
The second way to remove solder from a joint is with a desoldering pump or solder sucker. This tool is best used in conjunction with an ESD safety gear — in this case, a nozzle that protects certain components from static electricity.
Merely set the pump by pushing down the plunger until it clicks into the lock position, and then apply the nozzle and your soldering-iron tip to the joint. The solder will melt after a few seconds, so you release the plunger and the pump sucks the melted solder away from the joint.
Tags
Show AllPosts
2024
April
2023
2022
2021
The Ultimate Guide to Selecting the Right Industrial Equipment for Your Business
[04/02/24 10:15 AM]
February
Bevco - Importance of Ergonomics in Seating
[02/27/24 11:27 AM]
The Bevco Difference
[02/22/24 02:52 PM]
January
October
September
2020
Magnifying Glass Strength and What it Means
[09/15/21 10:03 AM]
Steps on How to Desolder a Keyboard
[09/01/21 10:39 AM]
August
What Is the Best Conductive Ink Pen for 2021?
[08/18/21 10:58 AM]
Tips on How to Find and Where to Use ESD Floor Products
[08/10/21 02:39 PM]
Quick Guide: What Is a Dial Test Indicator Used For?
[08/04/21 12:00 AM]
July
What Is an SMD Rework Station and How Does it Work?
[07/28/21 02:25 PM]
Quick Guide: How to Use ESD Mats and Wrist Straps
[07/14/21 12:05 PM]
June
All About Static Shielding and Static-Shielding Bags
[06/30/21 12:42 PM]
Conductive Ink: 5 Conductive Ink Uses for Modern Industry
[06/16/21 10:42 PM]
Soldering 101: How Long Do Soldering Tips Last?
[06/02/21 02:39 PM]
May
Industrial Needles: How Do I Choose A Needle Gauge?
[05/20/21 08:43 AM]
Guide to the Best SMD Rework Stations of 2021
[05/05/21 12:10 PM]
March
November
2019
How to Wash Clean Room Garments
[11/12/20 12:00 AM]
The Smallest Hot Air Rework Station on the Market
[11/04/20 01:21 PM]
October
The Best Stereo and Zoom Microscopes Available Today
[10/29/20 08:51 AM]
Office Floor Marking Tape for Social Distancing
[10/21/20 02:41 AM]
Top 5 Uses for LED Magnifying Lamps
[10/15/20 12:22 AM]
August
How to Choose The Best Magnifying Task Lamp
[08/26/20 11:32 AM]
Helping the Pharmaceutical Industry
[08/19/20 09:26 AM]
Moisture Barrier Bags, Desiccant and Humidity Indicator Cards
[08/17/20 12:58 PM]
How Q Source Can Help The Electronic Industry
[08/12/20 02:25 PM]
Tips on How To Best Organize Your Warehouse
[08/05/20 09:39 AM]
July
Social Distancing Products for Businesses
[07/29/20 05:14 PM]
A Guide to Gloves
[07/22/20 09:01 AM]
How to choose the right ESD Bag
[07/21/20 12:02 AM]
When and How to Properly Use Face Masks
[07/15/20 02:23 PM]
What is Dwell Time? Tips for Disinfecting Surfaces
[07/09/20 05:49 AM]
June
MetCal -GT-90 and GT-120
[06/23/20 10:10 AM]
Defining ESD Protective Packaging Requirements
[06/22/20 10:28 AM]
Differences Between Cleaning, Sanitizing, & Disinfecting
[06/19/20 12:49 PM]
How to Maintain a Virus-Free Work Environment
[06/17/20 11:17 AM]
Ergonomic Safety & Microscopes: Unitron Offers a Solution
[06/01/20 04:11 PM]
April
March
Differences Between Brazing, Soldering, and Welding
[03/09/20 09:11 AM]
Guide to Soldering: How to Use a Soldering Iron
[03/06/20 04:00 PM]
Guide to Cleanroom Classifications & Standards
[03/06/20 11:26 AM]
How to Clean a Circuit Board - A Q Source Guide
[03/05/20 11:54 AM]
Electrostatic discharge -ESD
[03/04/20 05:34 PM]
Guide to ESD vs. Anti-Static Work Safety Wear
[03/04/20 05:00 PM]
How to Use Tip Tinner - 6 Easy Steps - Q Source
[03/04/20 09:11 AM]
January
December
October
2018
Vision-Engineering-Guest-Blog-Lean-Mfg
[10/14/19 02:42 PM]
Vision Engineering - Guest Blog - Stereo Microscope
[10/03/19 12:31 AM]
September
July
Managing Your Q Source Web Orders
[07/11/19 09:32 AM]
Celebrating the Red, White & (Q) Blue - Q Source Will Be Closed on July 4th & 5th in Honor of Independence Day
[07/03/19 12:55 PM]
June
ESD Wastebaskets: An Overlooked Necessity for Your Workstation Environment
[06/26/19 12:48 PM]
Signs, Signs, Everywhere There's Signs...and Labels, Ribbons & More
[06/21/19 10:54 AM]
A How-To for Determining Torque Requirements for Threaded Fasteners - Guest Blog
[06/18/19 04:20 PM]
Celebrating 35 Years of Providing Best Value and Better Service for Our Customers
[06/13/19 09:50 AM]
Q Source My Account Focus: Miscellaneous Web Site Features
[06/12/19 11:48 AM]
Q Source Adds Global Pneumatic Tools Leader Simonds Inc.'s Cutting & Crimping Products to Lineup
[06/04/19 05:19 PM]
Favorites, Wish Lists & More: A Closer Look at Your My Account Shopping Tools
[06/03/19 11:21 AM]
May
Get a Free Extra Battery w/Atrix' New Omega Cordless Immediate Containment Vacuum
[05/29/19 12:13 PM]
Long Island SMTA Workshop to Discuss the "Deadly Sins" of SMT
[05/28/19 11:22 AM]
How to Properly Focus a Stereo Microscope - "On the Bench" Series
[05/17/19 04:02 PM]
Ergonomic Seating: Good for the Body and the Wallet – Guest Blog
[05/16/19 12:06 PM]
Soldering Comic Books Bring How-To Knowledge to a Wide Audience
[05/14/19 10:19 AM]
Accelerator-Free Nitrile to the Rescue! TechNiGlove International's Fight Against Nitrile Allergy - Guest Blog
[05/09/19 11:16 AM]
April
Free Shipping on Select Transforming Technologies 4500 Series ESD Rubber Table Mats
[04/29/19 12:46 PM]
Learn How to Get the Most Out of Your Q Source Web Account
[04/29/19 09:54 AM]
Q Source's Mobile Apps for iOS and Android Devices
[04/18/19 10:21 AM]
Bevco Backless Stools: All-Around Reliability for a Variety of Applications
[04/09/19 01:07 PM]
Create Your Q Source Web Account Today: Discover the Great Features & Benefits
[04/09/19 10:35 AM]
March
Free Shipping on Quantum Storage Systems Products
[03/29/19 09:42 AM]
Static Solutions ESD Hand Lotions Help Fight Potential Static Damage - Guest Blog
[03/22/19 12:55 PM]
Is Your ESD Flooring and Footwear System Working? – Guest Blog
[03/20/19 12:55 PM]
Q Source Web Account Benefits & Features
[03/15/19 03:05 PM]
February