Steps on How to Desolder a Keyboard

If you’ve decided to desolder a keyboard, you may be thinking that the process is going to be incredibly complicated and challenging — but you’ve never backed down from something hard in your life. Besides being able to say you can do it, maybe you want a keyboard that is customized to your wants and needs.
Your reason for wanting to know how to desolder a keyboard doesn’t really affect how you’d do it, and once you get into the process, you’ll discover it wasn’t as bad as you thought it would be. Following step-by-step instructions, you should be able to desolder your keyboard and create something new.
How to Desolder a KeyboardThe most important tool you’ll need when it comes to how to desolder keyboard switches is a soldering iron. Some of the other items you’ll need include the following:
- A well-ventilated work area
- The keyboard you’ll be working on
- Solder wire
- Solder sucker
- Switch puller
- Keycap puller
- Precision screwdrivers
Once you have all your tools in place, you’re ready to begin the steps to desolder your keyboard.
Step 1: Take the Keyboard Apart
For disassembling your keyboard, you’ll need to remove the keycaps from the switches. Since these are made from fine plastic, it’s advised that you store them in a secure location away from the heat of your soldering iron.After the keycaps have been removed, you’ll then need to remove the casing by removing the screws, which are typically found on the underside of the keyboard. It’s possible the screws are underneath the rubber feet. Once the casing has been removed, you will then remove the PCB from the mounting posts by removing the screws that hold it in place.
Step 2: Place Your Items on a Heat-Insulted Mat
Using a heat-insulated mat will ensure that your work surface doesn’t get damaged or melt. You might also consider wearing eye protection as well to protect your eyes from accidental splatter.Step 3: Find the Switches that Need to be Desoldered
If you only have a few switches on your keyboard that you want to desolder, then you’ll need to mark which ones they are. If you plan on desoldering them all, then you don’t need to keep track of which ones are which.Step 4: Prepare Your Soldering Iron and Sucker
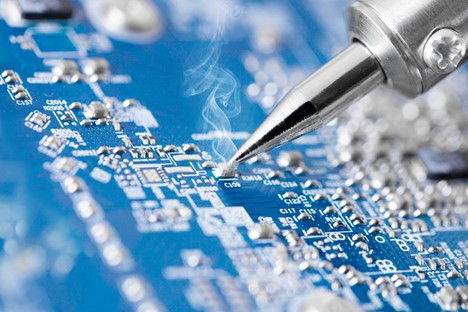
Now that you’re about ready to start desoldering, you’ll need to turn on your soldering iron. Depending on the type of keyboard you’re working on, it’s recommended that the temperature be set between 350 and 380 degrees Celsius.Once the iron is heated and ready, you’ll want to tin it, which you’ll achieve by adding some soldering wire to it. Now is also when you’ll want to have your solder sucker ready to go. You can prime the pump by pushing the plunger down.
Step 5: Desolder the Keyboard
Using your solder iron, you’ll press the tip into the pad and touch the pin and hold it there for several seconds. The solder should become liquid at this point. If it doesn’t, you’ll need to increase the temperature on your soldering iron.Your solder sucker can then suck up the liquid solder. Once the solder has been removed, you have successfully desoldered your keyboard.
Make Desoldering Your Keyboard as Easy as Possible
Now that you’ve learned how to desolder keyboard switches, you know it’s not complicated, but you do need to have the right tools. At Q Source, we have exactly what you’re looking for to make this process easy. Check out our soldering and desoldering selection today!